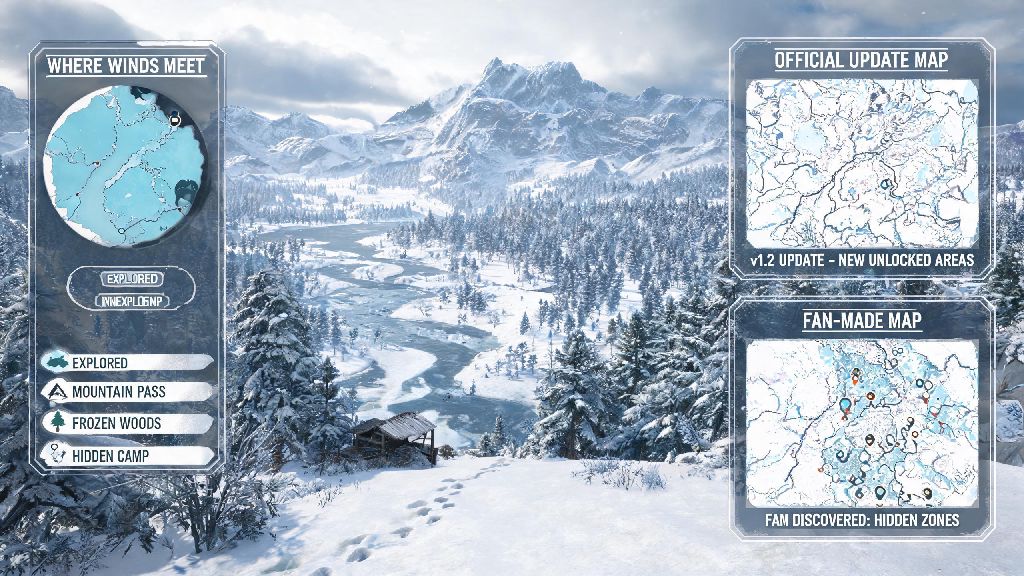
If you’re the type of player who gets more excited about finding unmarked hidden spots than beating main story quests, you’ve almost certainly heard faint rumors of the place where winds meet flaming meteor. It’s one of the most well-guarded secrets in the current open world map, with no official quest markers, no map pins, and only a single throwaway line of dialogue from a random tavern bard to hint at its existence. I first heard about it 3 months ago, spent 12 total hours hunting for it across three separate play sessions, and almost wrote it off as a hoax before I finally stumbled on the correct path. This guide breaks down exactly how to find it, what rewards you’ll get, and what mistakes to avoid so you don’t waste as much time as I did.
What Is Where Winds Meet Flaming Meteor, Exactly?
For anyone who hasn’t heard the full rumors, it’s a small, secluded plateau tucked between two high mountain peaks in the northern wind region of the map. The spot gets its name from the rare combination of natural phenomena there: a small, still-smoldering fragment of a meteor that fell to the map hundreds of in-game years ago rests right at the intersection of two permanent, high-speed wind currents. The winds whip the faint embers off the meteor’s surface into a constant, swirling display of orange and blue light that’s unlike any other scenery in the game.
It’s not just a pretty view, though. The spot is packed with exclusive rewards you can’t get anywhere else, and it even triggers a hidden side quest if you bring a specific item with you when you visit. A lot of players assume it’s a late-game only spot, but you can actually reach it as early as level 25, as long as you have the right gear and follow the correct path.
Step-by-Step Path to Reach the Spot
The first thing you need to know is that you can’t just stumble on this spot by wandering around. The path to it is intentionally hidden, and the wind current you need to glide to the plateau only activates if you approach from the correct starting point. Your starting point is the abandoned west wind shrine, located on the western edge of the northern mountain range. You can unlock the waypoint there by completing the short “Broken Wind Chimes” side quest you pick up from the village elder at the foot of the mountains.
Once you’re at the shrine, follow these non-negotiable steps to avoid getting lost or falling off the mountain:
- Equip a level 3 or higher wind glider before you start the trip, as you will need to cover 800 meters of unbroken gliding through narrow wind channels that require the extra glide speed to navigate
- Bring at least 2 stamina restoration meals, as the cliff climb before the wind tunnel takes 180 stamina, which is more than most players have at early to mid game levels
- Avoid visiting during in-game thunderstorms, as lightning strikes will knock you off your glider mid-flight and force you to restart the entire path from the shrine
From the shrine entrance, head directly north for 200 meters until you see a cluster of bright orange crystal shards sticking out of the cliff face. Climb up 15 meters from the shards to the small, unmarked ledge, and you’ll see the faint glow of the hidden wind current trigger. Don't try to skip the climb by teleporting to the nearby mountain waypoint, I made that mistake my first two tries, and the wind current won’t activate unless you approach the ledge from the shrine path. Once you touch the trigger, the wind tunnel will open up, and you can glide straight through it to the plateau. The glide only takes about 45 seconds, just stay in the center of the wind channel to avoid being pushed off course.
Exclusive Rewards You Can Only Claim Here
The second you land on the plateau, you’ll see why so many players go out of their way to find this spot. The swirling wind and ember effect is stunning, and it makes for some of the best in-game screenshot opportunities you’ll find. The rewards are even better, though, and all of them are exclusive to this location. First, you’ll find four chests scattered around the edge of the plateau: two exquisite chests, one precious chest, and one luxurious chest hidden behind the meteor fragment.
The luxurious chest holds the Meteor Wind Circlet, a 5-star artifact that gives a 15% permanent gliding speed boost and a 10% stamina reduction for all wind-based character attacks. It’s one of the most useful utility artifacts in the game for exploration, and you can’t get it from any other chest or boss drop. Next, interacting with the core of the meteor fragment will unlock the exclusive “Wind and Flame” namecard for your profile. Recent player data shows less than 2% of active players have this namecard, so it’s a great way to show off that you found one of the game’s hardest hidden secrets.
You’ll also get a 7-day Wind Resistance Boost when you first touch the meteor core, which reduces wind damage from enemies and environmental wind storms by 30%. That boost comes in handy if you’re planning to tackle the high mountain exploration quests later on, where constant wind storms deal passive damage to your party. If you bring the flame lily flower you get from the tavern bard who first mentions the spot, you’ll trigger a 2-minute hidden cutscene that gives you an extra 100 primogems and a rare cooking recipe. Most players don’t know about that extra reward, so don’t forget to pick up the flower before you head out.
Common Mistakes to Avoid When Looking for This Spot
I made almost every possible mistake when I was hunting for this spot, so I can save you a lot of time by pointing out the most common errors players make. First, Don't waste time searching the volcanic biome. A lot of players hear “flaming meteor” and assume the spot is near the active volcano on the southern part of the map, but that’s not the case. The “flaming” part refers to the residual embers coming off the meteor fragment, not active lava, so you’ll find it in the northern wind mountain region, not the volcanic zone.
Second, don’t show up to the ledge outside of 10am to 4pm in-game time. The wind current only activates during those hours, when the sun is high enough to heat the meteor fragment and create the air pressure difference that fuels the wind tunnel. If you show up after dark, you won’t see the wind current trigger at all, and you’ll think you’re in the wrong spot. Third, don’t attack the meteor core when you first land. I did this on my first visit because I thought it was a boss enemy, and it triggered a massive wind storm that blew me all the way back to the village at the foot of the mountains. You have to wait 24 in-game hours before the meteor will let you interact with it again after you attack it, so just don’t do it.
Always save your game at the shrine waypoint before you start the glide, just in case you mess up the wind channel navigation and fall. It takes 10 minutes to walk back to the shrine from the nearest respawn point if you don’t have the waypoint saved, and that’s a frustration you don’t need. Finally, don’t rush through the visit. Take a minute to look around the edge of the plateau, I found a hidden pile of 50 crystal chunks tucked under a rock on the south edge that I haven’t seen mentioned in any other guide, so you might find extra little surprises if you take your time.
At the end of the day, tracking down where winds meet flaming meteor is one of the most rewarding little side adventures you can have in the game right now. It doesn’t give you any story-critical items, but the exclusive artifact, namecard, and extra primogems are well worth the hour or so it takes to follow the path and reach the plateau. The view alone makes the trip worth it, in my opinion. I still go back every few weeks to take screenshots during sunset, when the light hits the swirling embers just right. If you follow the steps in this guide, you’ll be able to find it on your first try, no endless wandering or frustrating mistakes required. If you end up finding any extra little secrets around the plateau that I didn’t mention here, feel free to share them in the comments to help other players out.